Most gaming chairs or office chairs come in a big box in bits and pieces and you have to figure out how to assemble a gaming chair.
Proper assembly is really important because an improperly or carelessly assembled gaming chair can be dangerous, as stability can be compromised. After all, during intense combat when playing video games, significant loads arise and act on the structure and frame of the chair.
However, a good chair that is properly assembled should have no trouble withstanding these stresses
How to assemble a gaming chair
Clear and easy-to-understand assembly instructions are important, this is another way of recognizing a good manufacturer. As many of the parts as possible should be pre-assembled and the instructions on how to assemble a gaming chair should be easy to follow.
Read the instructions thoroughly and look carefully at the illustrations. Follow the recommended steps to set up the gaming chair. The following tips on how to assemble a gaming chair are guidelines only. Depending on the chair model and which parts are pre-assembled, the assembly steps may vary slightly.
Setting up a gaming chair
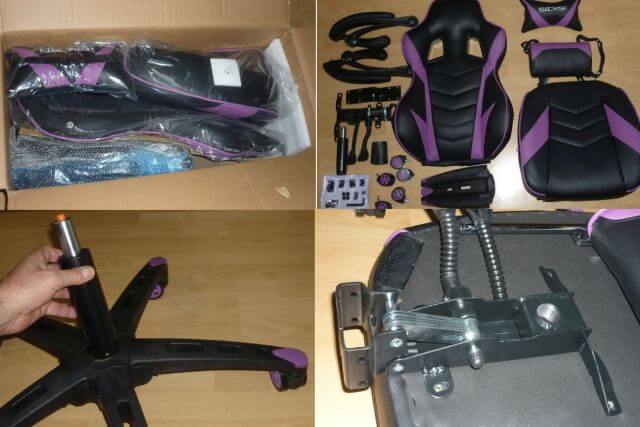
The first step is unpacking the whole lot and best spreading all the parts on the ground, so you get an overview.
Check for completeness and integrity of the parts before assembling everything. The instruction pamphlet usually has a content checklist. If all is complete and no parts are broken start setting the chair up.

Wheelbase setup – Insert all five caster wheels into the designated holes in the wheelbase.
Gas Lift Spring – Turn over the wheelbase so that it stands on the rollers and insert the gas spring into the central opening. Then slide the telescopic cover over the gas spring.
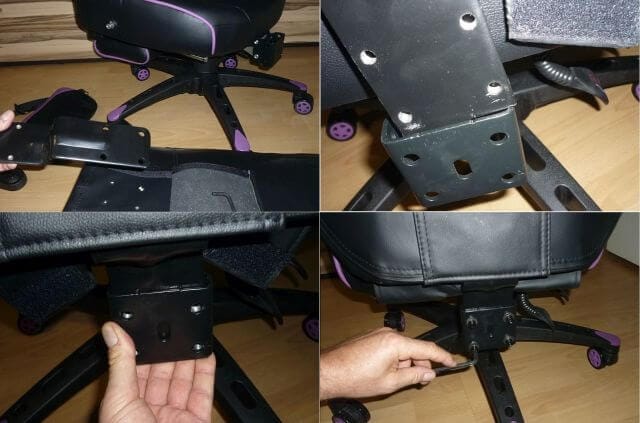
Tilt Mechanism – If the tilt mechanism is not yet mounted on the seat, then that would be the next step. Usually, there are thick bolts that fasten the tilt mechanism to the underside of the seat. In some models this may be preinstalled, obviously, you can then go straight on to the next step.
Joining Seat and Wheelbase – In the next step, the seat with fitted tilt mechanism is now to be aligned with the gas lift spring which is already fitted to the wheelbase. Push the gas lift into the receiving aperture of the tilt mechanism. Nothing is screwed here. Even if this connection is only pushed together, once you sit down it will lock into place.

Backrest Installation – Next, the backrest can be mounted to the seat. This can be a tricky business. Be careful to keep your hands clear of the brackets. When the back tilt lever is activated the brackets will snap forcefully forward. Usually, there are two bolts on either side of the backrest, which connect the same to the receiving brackets mounted on the seat. Cover the brackets with the provided plastic covers.
Armrests – If the armrests are not already pre-mounted to the seat, then this would be the next step. Pay attention not to mount left to right and vice versa. There are 3 to 4 bolts with which the armrests are fitted to the underside of the seat. The mounting brackets have long slits which are there to adjust the distance of the armrests.
If your new chair has head and lumbar cushions, you can attach them now. Attaching the pillows is very easy. The neck support pillow is simply strapped to the top of the backrest. The straps of the lumbar pillow are fed through the holes in the backrest, close the buckles on the backside.
Done. Before you sit on the chair for the first time, check whether all the screws are tight. Now sit down and enjoy sitting in comfort in your new gaming chair.
Well, assembling the gaming chair was easy, wasn’t it? If you still have parts left after following the included assembly instruction, then you’ve done something wrong!!!
Inspect your gaming chair every couple of months for wear and tear and also check if all screws are tight. If you notice any part becoming defective, get chair replacement parts, and replace them in due time.


